Before you start
Have these ready. Only the first two are required.
- A phone or laptop to run the owner console.
- Your menu with prices. A photo of your menu board is fine to type from.
- A Razorpay or Cashfree account if you want guests to pay online.Optional
- A tablet for the kitchen and a thermal printer with 58 or 80 mm rolls for KOTs.Optional
- Any TV with a browser for the token board.Optional
1Create your account
Open the sign-up page and enter your email, a password and the web address you want, for example brew.dinedash.food. This becomes your menu link.
We send a confirmation email. Open the link in it before you try to go live. You can set everything else up first.
2Your café
Add your café name and logo. They appear on your menu, bills and QR sticker. A square logo looks sharpest.
3Restaurant type
Tell us how you serve guests. This switches the right features on for you. You can change any of it later in Settings.
4Menu
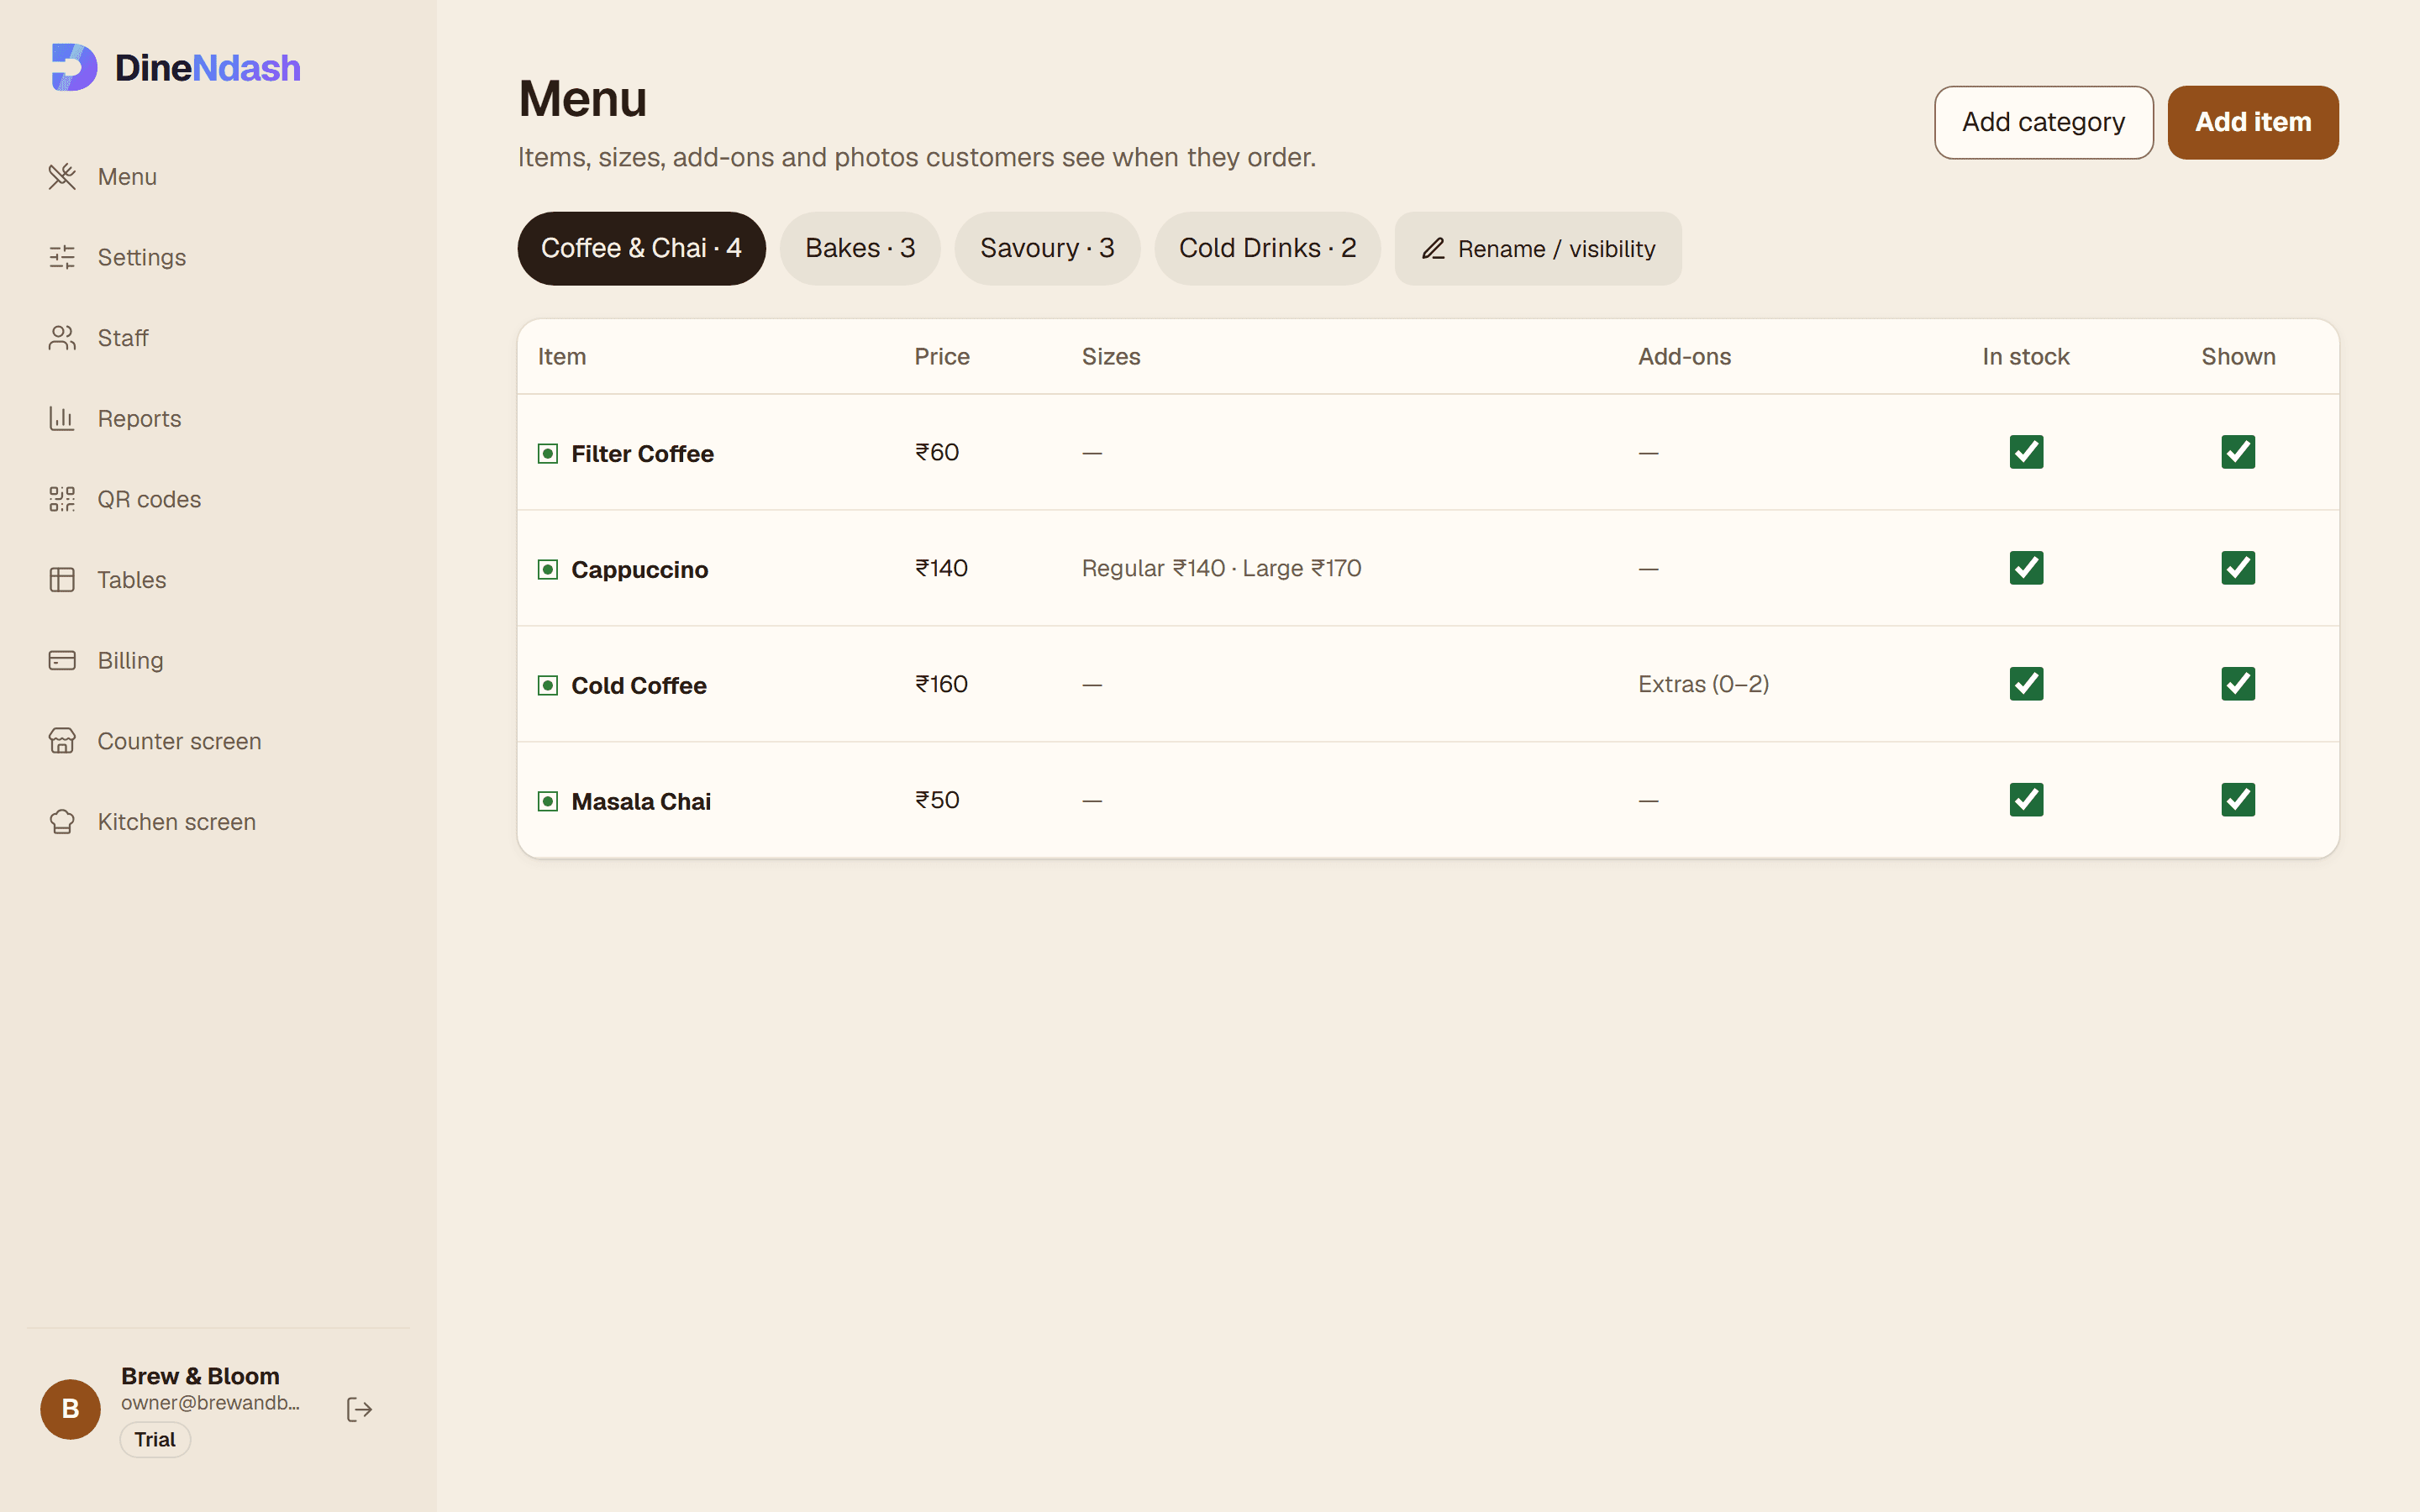
The setup screen lets you quick-add one category and up to five items, enough to go live. Use Open full menu editor for the rest.
- Create categories in the order guests should see them, like Coffee & Chai, Bakes, Savoury.
- Add each item with a name and a price in rupees. Add a photo, a short description and the veg or non-veg mark.
- Add options where needed, like Large or Extra shot, each with its own price.
- During service, switch an item off to mark it sold out. It disappears from every table at once.
5Payments
New cafés start with pay at counter: guests order from their phone and pay at the counter. You can go live like this and add online payments later.
Add online payments (on plans that include online payments, see Pricing):
- In your Razorpay dashboard, open Account & Settings → API Keys and generate a key in Test mode.
- In DineNdash, open Settings → Integration keys and add the Key ID and Key secret for Razorpay.
- Press Test connection, then place a test order from your phone using Razorpay’s test UPI or card.
- When it works, generate Live mode keys in Razorpay and replace the test keys.
6Staff
Optional. Invite cashiers and kitchen staff now, or later from the Staff page. Each person gets their own login and sees only their screen.
7Go live
The checklist shows what’s left. Your café, menu and payments must be done. Then press Go live.
- Download your QR sticker and print one per table, plus one for the counter.
- Scan it with your own phone and place a real order to see the whole flow.
8Kitchen screen and printer
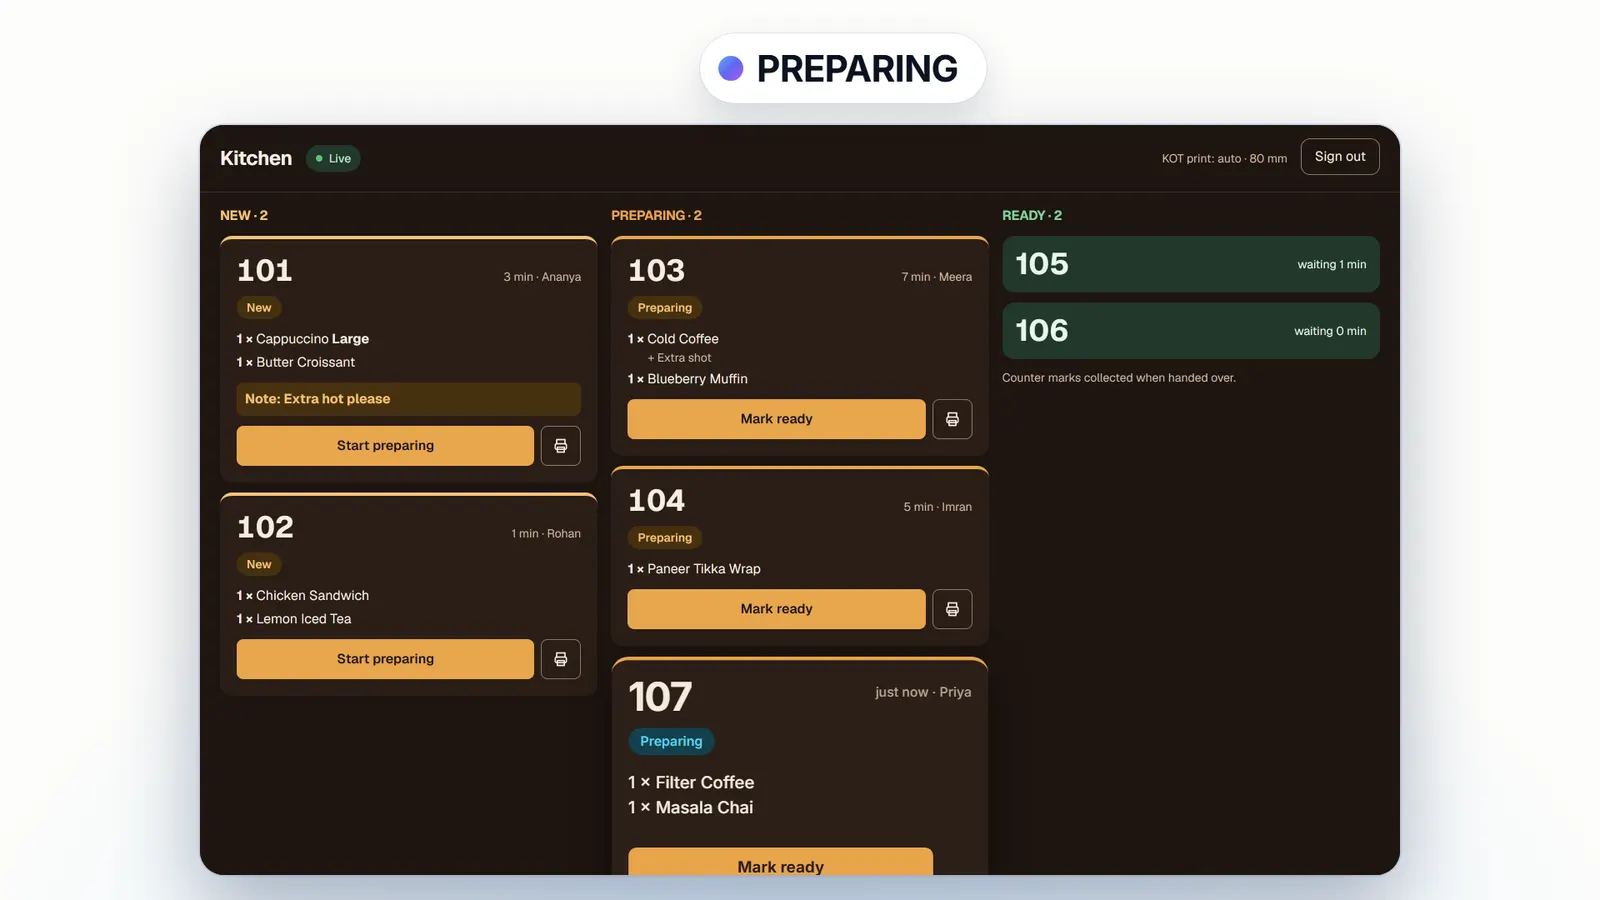
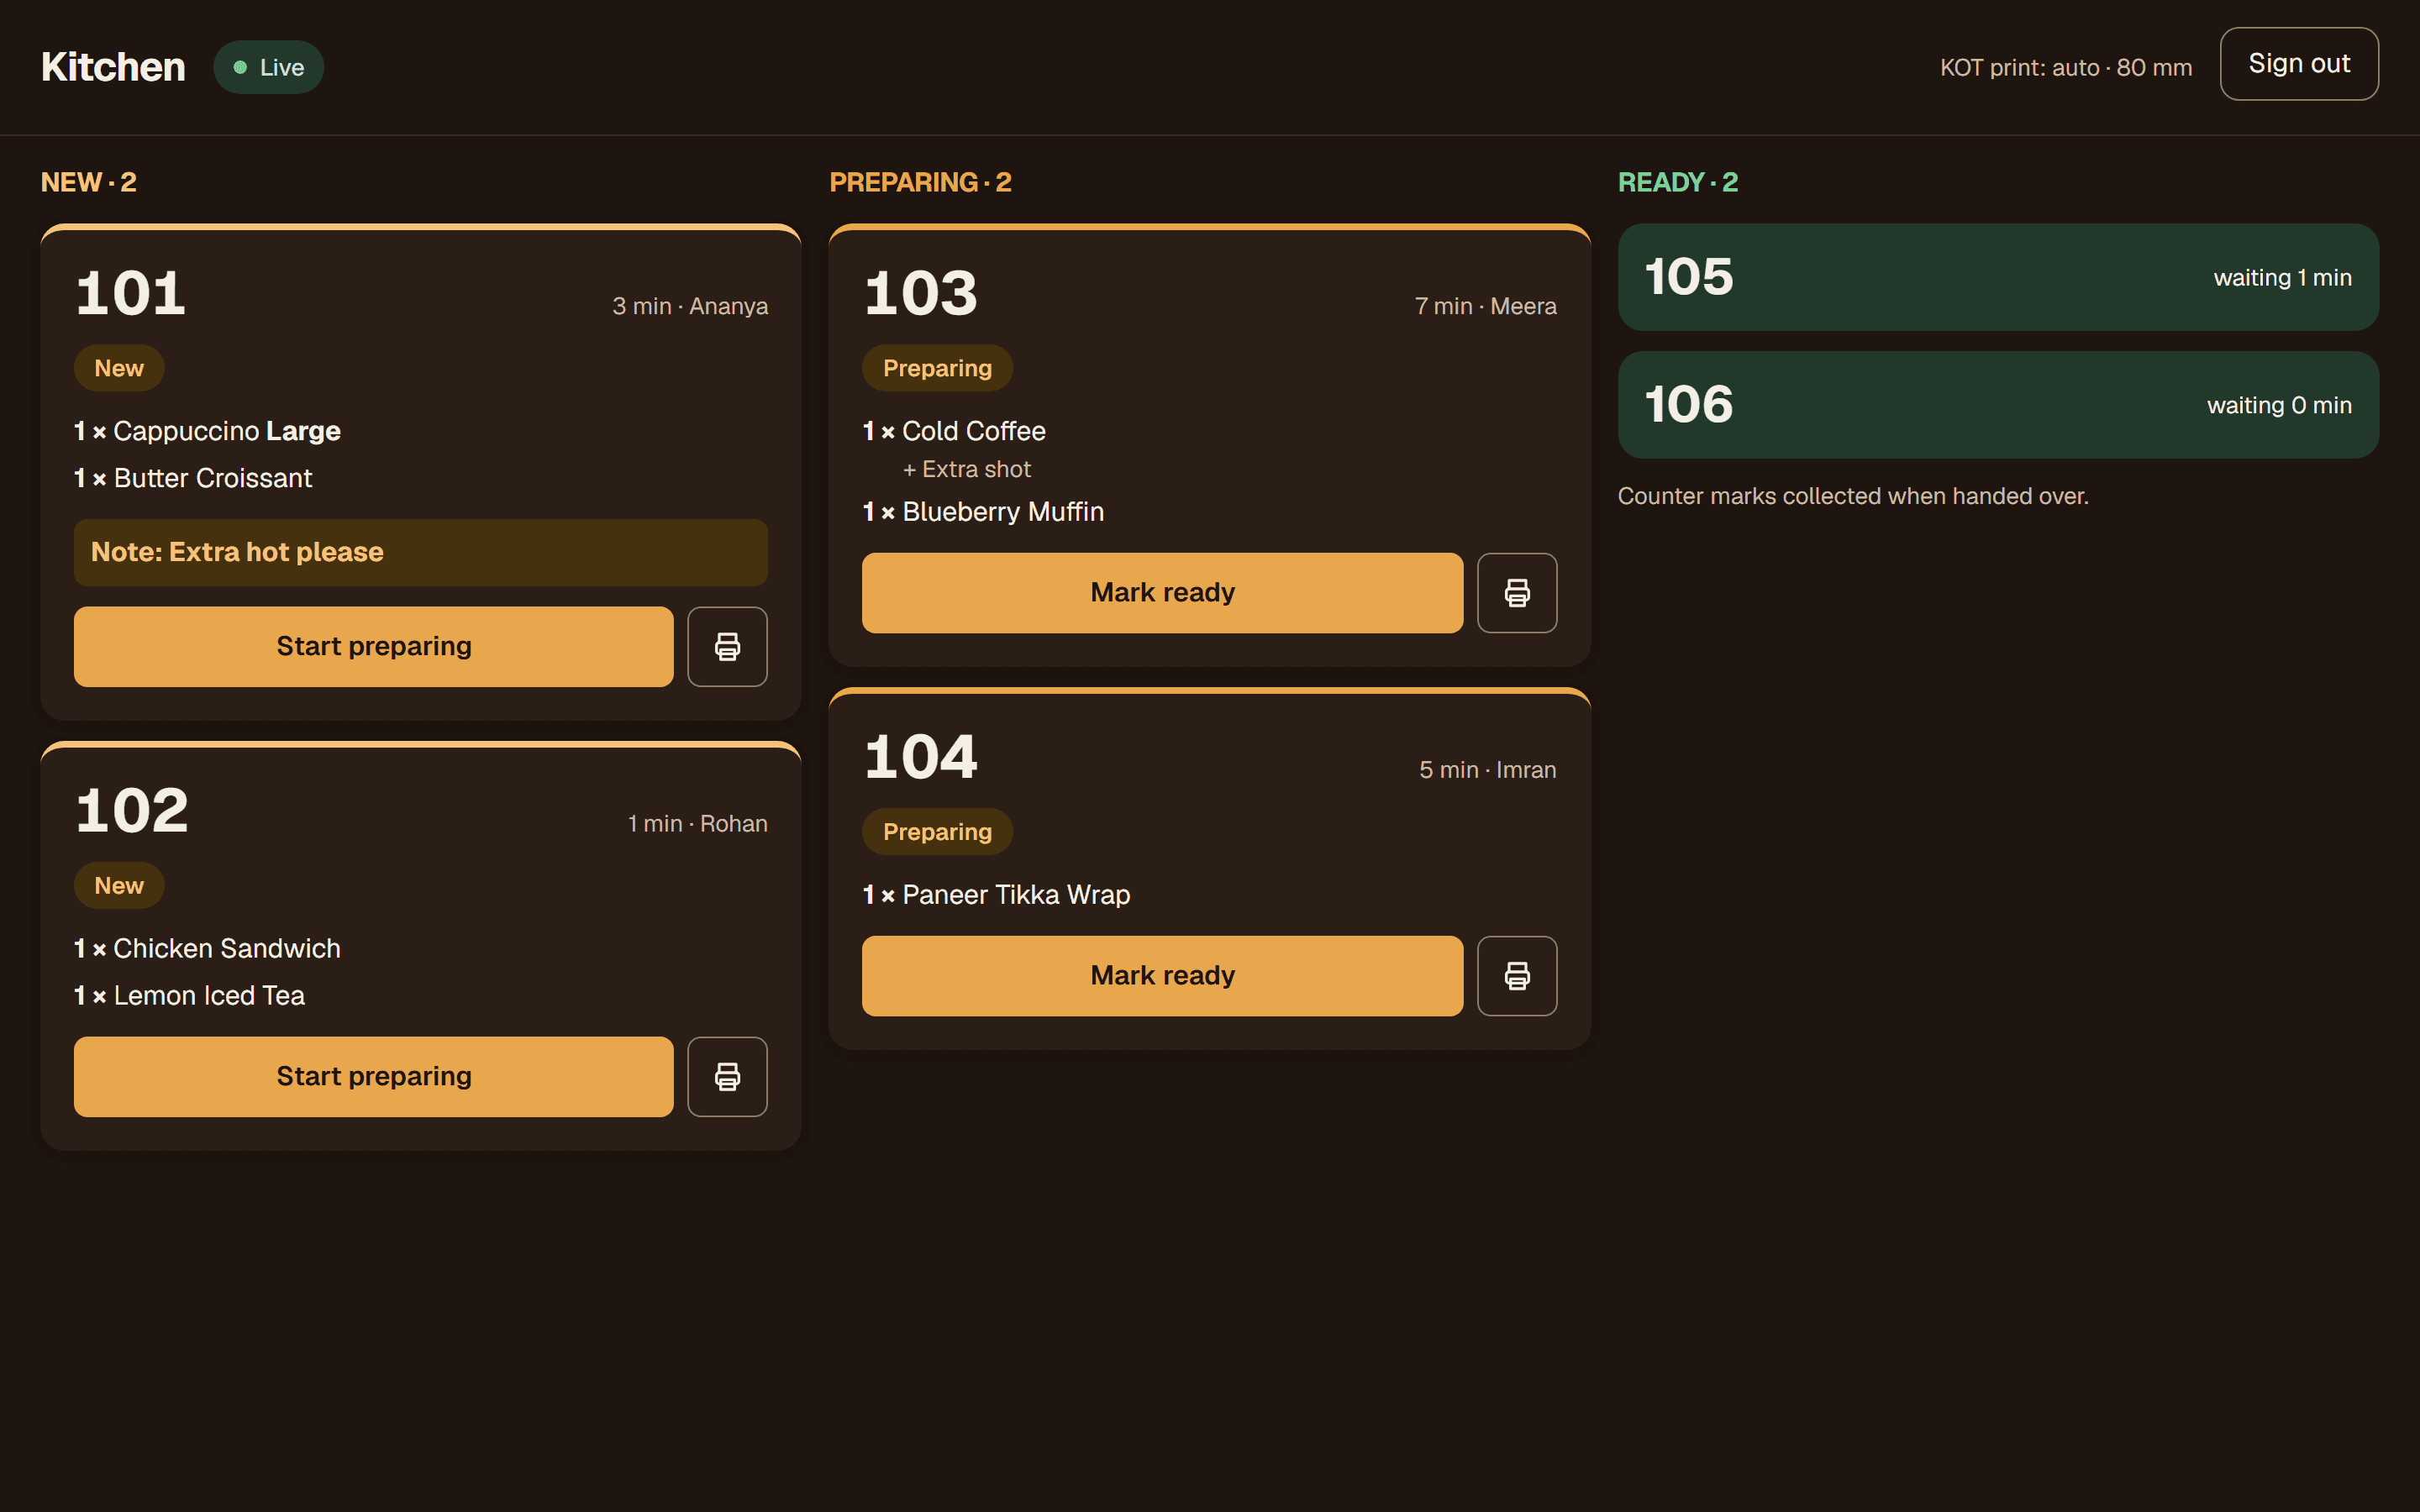
Sign in on the kitchen tablet with a Kitchen login. New orders appear in New, move to Preparing and then Ready with one tap each.
- Connect a thermal printer that takes 58 or 80 mm rolls to the kitchen device.
- In Settings → Kitchen & printer, turn on Print KOT and Auto-print on new paid order, and pick the paper width.
- Place a test order. The KOT prints with the token, table, items and any notes.
9Token board on a TV
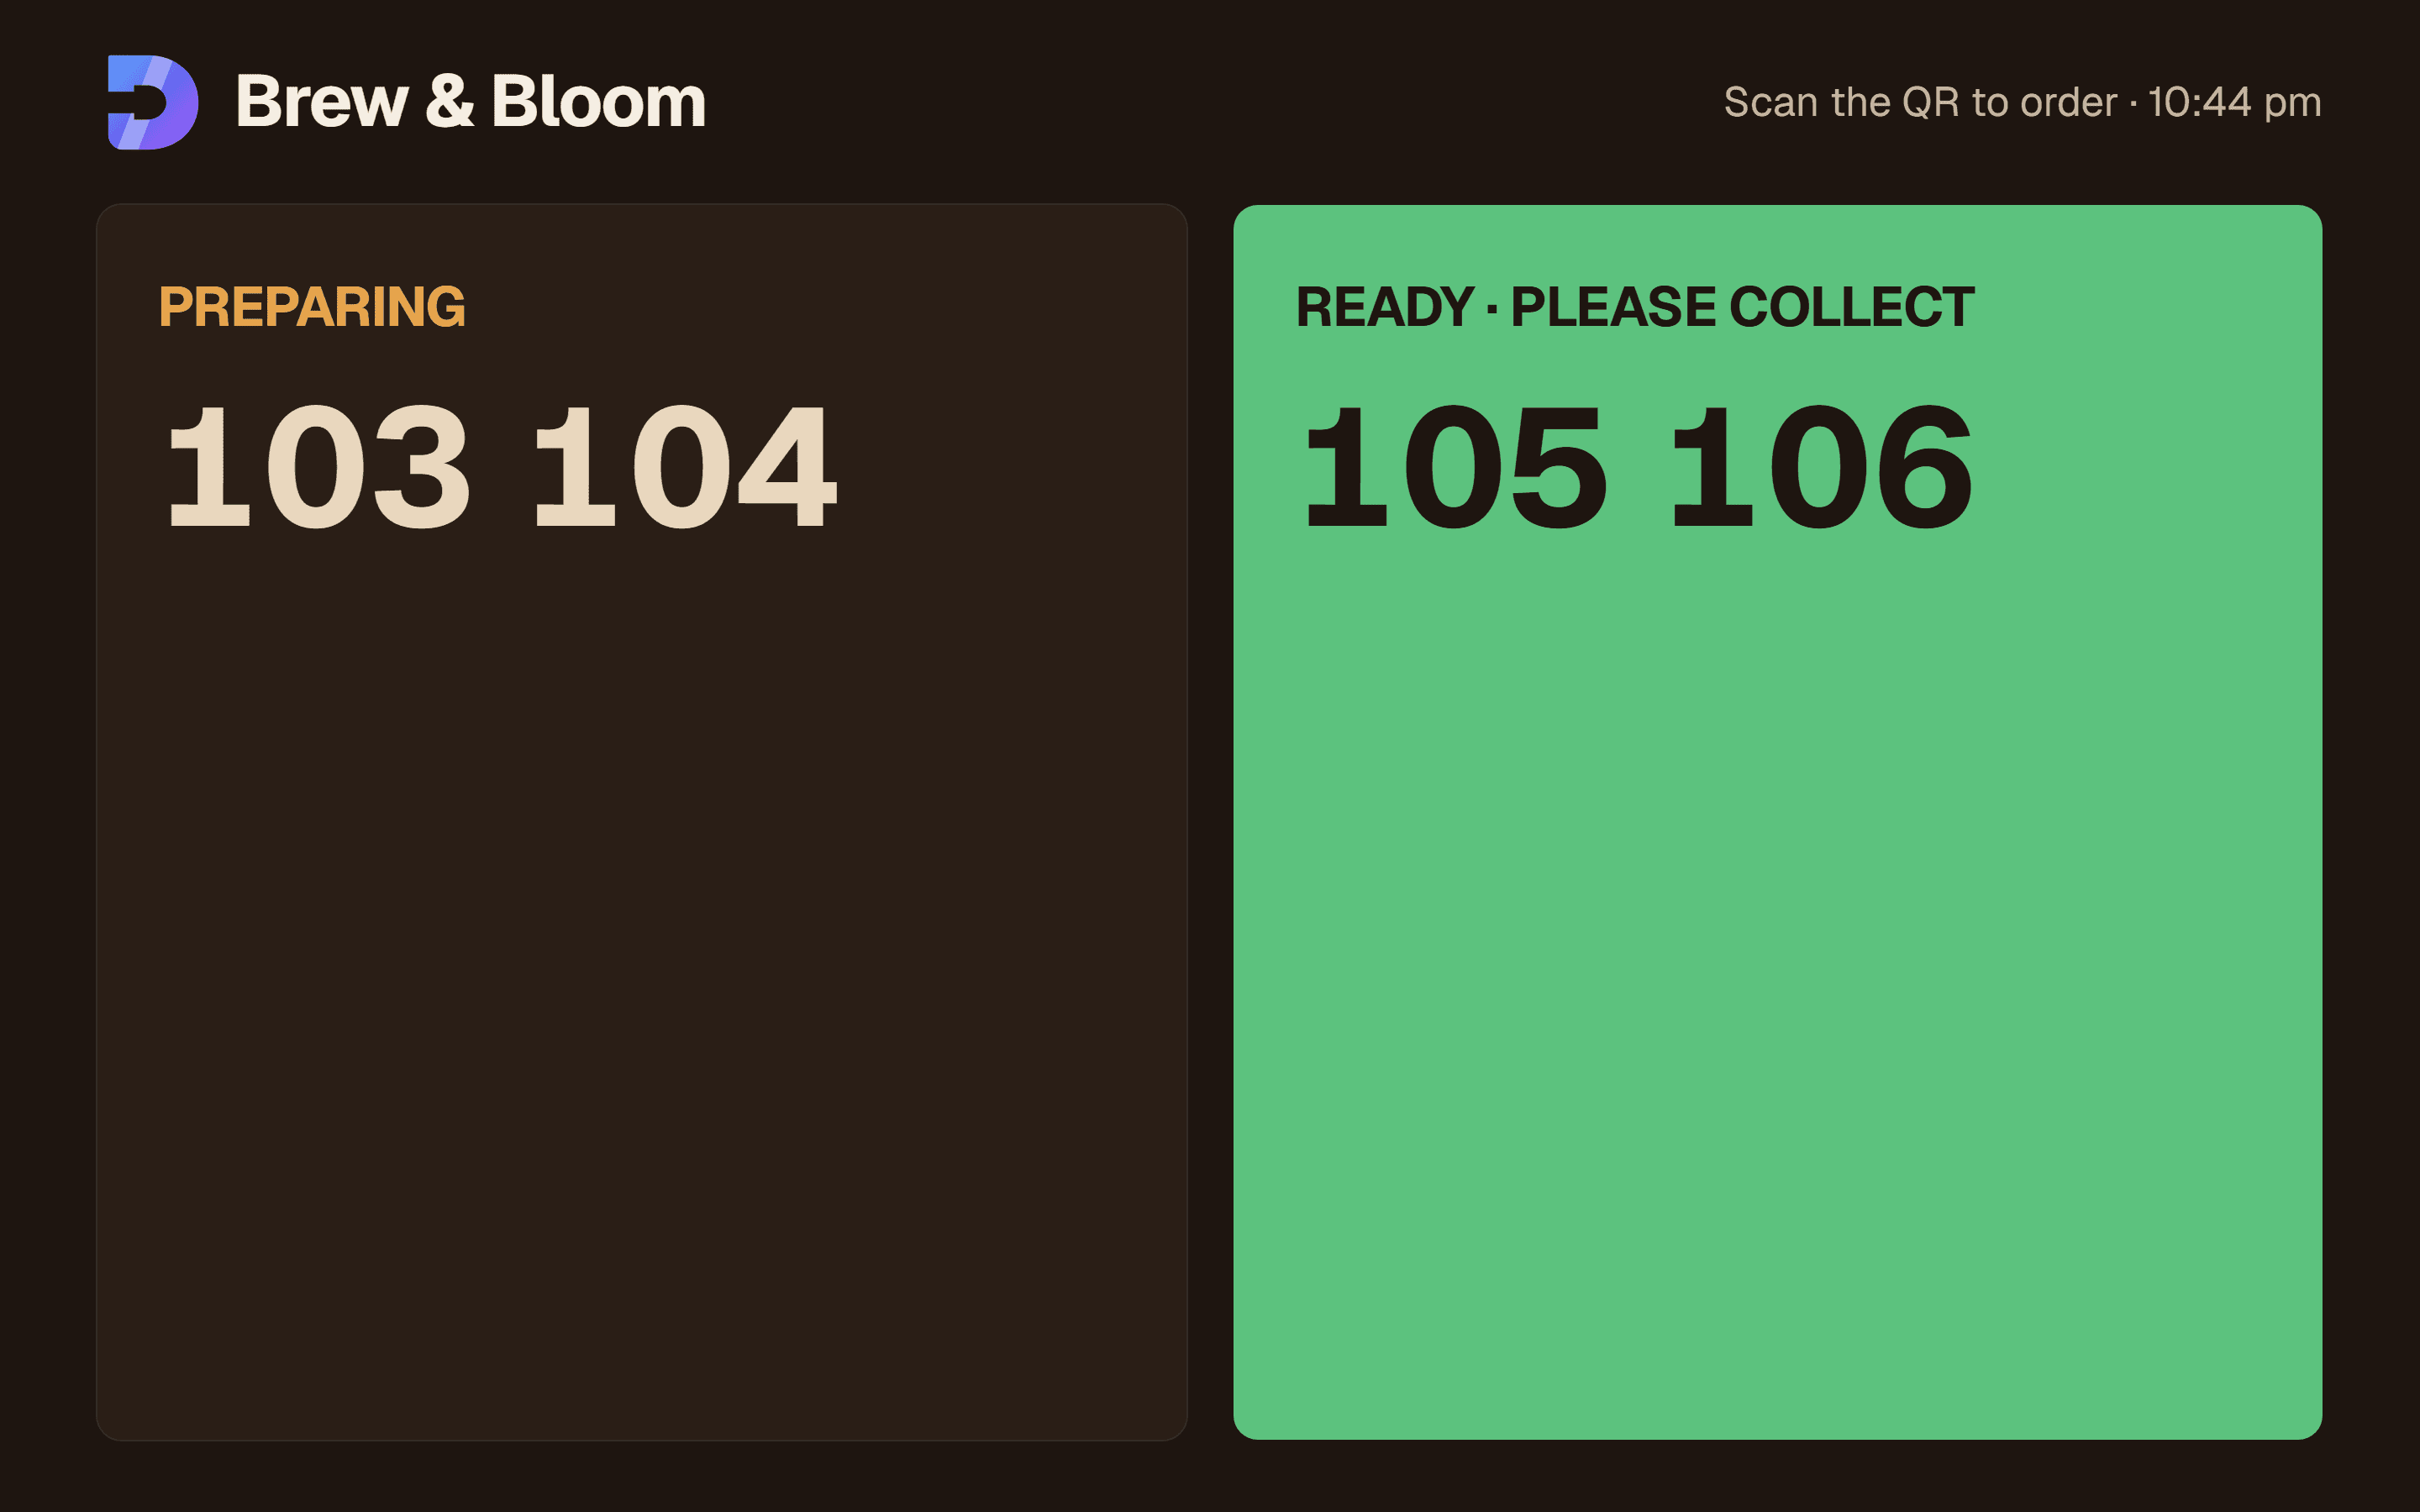
Turn on Token board TV in Settings, then open your board link on any TV or monitor with a browser and make it full screen. Ready tokens show in large green numbers guests can read from across the room. It updates on its own.
A normal day
- OpeningSwitch on the kitchen tablet, printer and TV. Mark anything you’re out of as sold out.
- ServiceGuests scan and order. Kitchen prepares, counter calls tokens. Confirm pay-at-counter orders when the guest pays.
- ClosingOpen Reports for today’s sales, payment split and best sellers. Export CSV if your accountant wants it.
If something’s wrong
Confirm your email first by opening the link we sent you, then try again. The checklist also shows any step still missing.
Your payment keys aren’t saved yet. Open Settings → Integration keys, add them and press Test connection.
Pay-at-counter orders wait for the counter to confirm payment before they go to the kitchen. Check the Counter screen.
Check the printer has paper and power, and that Auto-print on new paid order is on. Use the printer icon on the ticket to print it again.